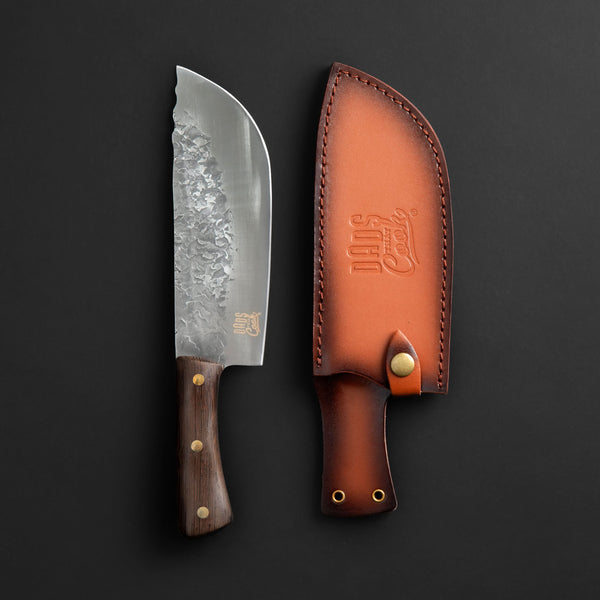
The difference between a clean onion dice and a ragged pile of onion bits usually is not talent. It is grip. Learn how to hold a chef knife correctly, and the blade starts working with you instead of feeling like a slippery, sharp object you have to wrestle. That means faster weeknight prep, cleaner cuts on brisket trim, and more confidence when the family is waiting for dinner.
A good grip is not about looking like a restaurant chef. It is about putting your hand behind the blade, keeping your knuckles protected, and letting a sharp knife do the heavy lifting. Get this right first. Then build speed.
How to Hold a Chef Knife: Start With the Pinch Grip
For most slicing, chopping, and dicing, the pinch grip is the strongest, most controlled way to hold a chef knife. It sounds technical. It is simple.
Place your thumb on one side of the blade, just in front of the handle. Put the side of your index finger on the other side, directly across from your thumb. You are lightly pinching the blade where it meets the handle. Your remaining three fingers wrap naturally around the handle.
That small pinch gives you direct control over the blade. Instead of steering the knife from the far back of the handle, your hand is positioned close to the cutting edge. The knife feels more balanced, especially with a full-tang chef knife built to carry some real weight through the handle and blade.
Keep your grip firm enough that the knife cannot shift, but not white-knuckled. A death grip tires out your hand and makes your cuts jerky. Think strong handshake, not hanging from a pull-up bar.
Find the right spot on the blade
The pinch point sits at the blade's heel, where the steel meets the handle. Do not grip the sharp cutting edge. Your thumb and index finger should rest on the flat sides of the blade above the edge.
If your chef knife has a bolster, the thicker metal transition between blade and handle, pinch just forward of it. If it has no bolster, use the same position: thumb and index finger on the blade, other fingers around the handle. The exact spot can shift slightly based on your hand size and knife design. The goal stays the same: control at the blade, not distance from it.
Let the handle fill your hand
Your middle, ring, and pinky fingers should close around the handle without squeezing hard. Your wrist should stay straight and relaxed. If your wrist is bent sharply to one side, reset your stance and move the cutting board closer or farther away.
A knife that is too large can make the pinch grip feel awkward. A 7.5-inch chef knife is a capable everyday size for many home cooks because it handles onions, herbs, chicken, and thick vegetables without overwhelming the hand. An 8-inch blade gives a little more reach for bigger jobs. Neither is automatically better. The right choice is the one you can guide confidently.
Your Guide Hand Matters Just as Much
The hand holding the food is not an afterthought. It is your safety system.
Curl your fingertips inward so your knuckles face the blade. This is called the claw grip. Your fingertips stay tucked behind the knuckles, while your thumb stays behind the food instead of sticking out in front. The side of the blade can lightly touch your knuckles as it moves up and down.
That contact is not dangerous when the fingers are curled. It gives you a repeatable guide for even slices. Move your guide hand back a little at a time as the knife works through the ingredient.
Start slow with something stable, such as a peeled potato or a halved onion with its flat side on the cutting board. Avoid practicing on a rolling round vegetable like a whole tomato or carrot. First create a flat surface. Then make your cuts.
Use the Right Motion, Not Brute Force
A chef knife is designed for a rocking or slicing motion. The blade should travel forward and down, then lift just enough to reset. For herbs, keep the tip near the board and rock through the pile. For carrots, celery, and onions, guide the knife down and slightly forward rather than chopping straight down like a hammer.
That forward motion lets the sharp edge slice through food. Straight downward force can crush tomatoes, tear herbs, and make hard vegetables more likely to slip. Big cuts of dense squash are different. For those, stabilize the food carefully, use measured pressure, and choose a knife size and technique you can control. There is no prize for forcing one tool through every job.
Keep your non-knife hand clear before lifting the blade. Then reset. Clean, controlled repetitions beat fast, sloppy chopping every time.
When a Handle Grip Makes Sense
The pinch grip is the go-to for precision work, but it is not the only grip worth knowing. A full handle grip, where all four fingers wrap around the handle and the thumb rests against it, can be useful when you need extra reach or leverage.
Use it for tasks such as breaking down a large melon, making broad cuts through a head of cabbage, or carrying a knife safely from the board to the sink. It can also feel more natural to beginners for the first few practice sessions.
The trade-off is precision. With your hand farther behind the blade, small dice and tight trimming work become harder to control. Move into the pinch grip when you need accuracy. Switch to a handle grip when the job calls for leverage. Capable cooks adjust instead of treating one technique like a rule carved in stone.
Common Mistakes That Kill Control
The most common mistake is holding the knife at the very end of the handle for every task. That position gives the blade room to wander, particularly when you are chopping quickly. Bring your hand forward.
Another mistake is lifting the knife too high. High, dramatic chopping may look powerful, but it slows you down and increases the chance of missing the food or losing your guide hand position. Keep the blade close to the board.
A dull knife is another confidence killer. It requires more pressure, slides on slick surfaces, and turns simple prep into a fight. A sharp edge bites where you place it. Hone your knife regularly if you know how, and sharpen it when honing no longer brings the edge back.
Finally, do not ignore the cutting board. A board that slides is an accident waiting to happen. Place a damp paper towel or kitchen towel under the board to keep it planted. Use wood or quality plastic, not glass, marble, or a dinner plate. Hard surfaces beat up the edge and make every cut feel worse.
Build the Grip Into Real Cooking
Do not practice with endless imaginary cuts. Put the grip to work making dinner. Use it while dicing an onion for burgers, slicing bell peppers for fajitas, mincing garlic for a steak marinade, or chopping herbs for grilled chicken. Start at a pace where every cut lands where you intend.
As the movement becomes familiar, you will notice less tension in your shoulders and less fatigue in your hand. You will also waste less food. Even slices cook more evenly. Clean protein cuts look better on the platter. A properly held knife turns prep from a chore into the part where you take control of the meal.
A solid chef knife gives you the foundation for most kitchen work, and the right grip lets that tool earn its place. Dads That Cook gear is built for that kind of hands-on confidence: durable steel, balanced feel, and the muscle to handle everyday prep without making the cook work harder than the meal requires.
Tonight, put a stable board on the counter, grab an onion, and slow down for the first ten cuts. Pinch the blade. Curl your guide hand. Let the edge move forward through the food. The rest of the meal gets easier from there.