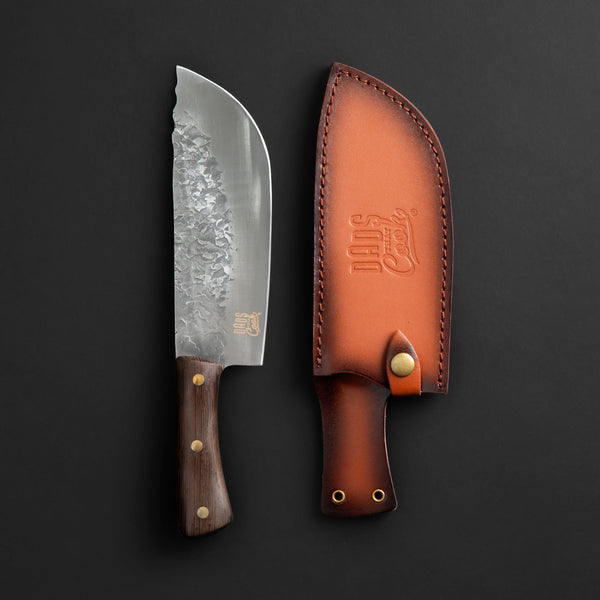
A roast can rest perfectly, a brisket can carry a bark worth bragging about, and a turkey can come off the grill golden and juicy. Then one dull, clumsy blade can tear it all apart. This meat carving knife guide is about protecting the work you put into the cook - and putting clean, worthy slices on every plate.
Carving is not fancy garnish work. It is the final move. Do it right, and each slice stays juicy, tender, and ready for the people gathered around your table. Do it wrong, and even great meat can look ragged and dry out fast.
What a Meat Carving Knife Actually Does
A carving knife is built to make long, controlled slices through cooked meat. Its blade is usually narrower and longer than a chef knife, often around 8 to 12 inches. That extra length lets you finish a slice in one smooth draw instead of sawing back and forth across the roast.
Less sawing matters. A sharp blade that glides through the meat leaves a clean surface and causes less juice loss. It also keeps the bark on brisket, the crust on prime rib, and the skin on turkey from getting shredded.
A carving knife is not the same as a cleaver, boning knife, or chef knife. A cleaver brings power for splitting through joints or handling tough prep jobs. A boning knife has the flex and control needed to work around bones and trim raw proteins. A chef knife is the everyday workhorse. All three earn their place, but none replaces a long slicing blade when it is time to serve a crowd.
Choosing the Right Blade for the Meat
There is no single knife shape that wins every cook. The right choice depends on what is on the cutting board and how often you carve it.
Straight edge for roasts and everyday carving
For prime rib, pork loin, ham, tri-tip, turkey breast, and roast chicken, a straight-edged carving knife is the most versatile choice. Look for a long, narrow blade with a pointed tip. The point helps you start cuts precisely and work around bones or joints when needed.
A blade around 8 to 10 inches suits most home cooks. Go longer if you regularly smoke full packer briskets, carve large turkeys, or serve rib roasts. A longer blade gives you a cleaner stroke, but it also takes more control and needs a cutting board big enough to match.
Granton edge for sticky, delicate slices
Some carving knives have shallow oval hollows along the blade, often called a Granton edge. These dimples create tiny air pockets that can help thin slices release from the steel. They are especially useful for salmon, ham, roast beef, and tenderloin, where slices can cling to a smooth blade.
Do not buy a Granton edge expecting magic. Sharpness, technique, and the direction of your cut matter more. But if you love paper-thin roast beef or holiday ham, it is a useful feature.
Serrated slicer for crusty bark and bread
A serrated slicing knife can be a strong option for crust-heavy brisket, smoked meats with a firm exterior, and bread. Its teeth grip the surface before moving through the center. The trade-off is that serrations can leave a rougher cut face than a sharp straight edge, especially on tender meat.
Use serration when the exterior is the obstacle. Use a straight edge when you want the cleanest possible slices. For a dad who smokes brisket every weekend, having both is not overkill. It is being prepared.
The Build That Makes a Knife Feel Right
A good carving knife should feel like an extension of your hand, not a slippery piece of hardware you fight through dinner service. Balance is the first thing you will notice. When you pinch-grip the blade near the handle, the knife should not feel dramatically tip-heavy or handle-heavy.
Full-tang construction is worth seeking out. That means the steel runs through the handle rather than stopping at its base. It adds strength, stability, and a more grounded feel during long cuts. When you are carving a hot turkey with family waiting, a stable knife inspires confidence.
Stainless steel is practical for home cooks because it resists staining and corrosion better than high-maintenance carbon steel. Still, stainless does not mean ignore it. Wash it promptly, dry it fully, and do not leave it sitting in a sink. The dishwasher is even worse: heat, detergent, and blades knocking against other tools can dull an edge in a hurry.
Handle material is more personal. A textured synthetic handle is low-maintenance and dependable around wet hands. Wood brings classic good looks but needs more care. Whatever you choose, make sure the handle gives your fingers room, stays secure in your grip, and does not create hot spots during longer carving sessions.
How to Carve Without Wrecking Great Meat
Start before the knife touches the food. Let meat rest. A steak may need five to 10 minutes, while a large roast, brisket, or turkey can need 20 to 45 minutes depending on its size. Resting gives juices time to settle back into the meat instead of flooding the board on the first cut.
Set up a stable cutting board with room on both sides of the meat. A board with a juice groove is helpful for roasts, but avoid one so small that the knife hangs off the edge. Put a damp towel under the board if it tends to slide. No hero points for wrestling unstable equipment.
Use the blade length. Place the knife near the far side of the meat and draw it toward yourself in one deliberate stroke, using light downward pressure. Do not push hard. A sharp knife does the work. If you have to saw aggressively, stop and sharpen before you keep carving.
Always slice across the grain when serving beef, pork, flank steak, skirt steak, and brisket. The grain is the direction the muscle fibers run. Cutting across it shortens those fibers, making each bite feel more tender. With brisket, the flat and point often have grain running in different directions, so rotate the meat as needed rather than forcing one cutting angle.
For poultry, remove legs and thighs at the joints first, then separate the breast meat from the breastbone. Slice breast meat across the grain into even pieces. You can carve directly from the bird or remove each breast half before slicing. The second method often gives cleaner, more consistent portions.
Keep the Edge Ready for the Big Cook
A carving knife only earns its keep when it is sharp. Honing and sharpening are different jobs. A honing rod realigns a slightly rolled edge. It helps maintain a sharp knife between sharpenings, but it does not remove enough steel to restore a truly dull blade.
Sharpening creates a new edge. Depending on use, a home cook may need to sharpen a carving knife a few times a year. If it crushes tomato skin, drags through roast meat, or slips rather than bites, it is time. A quality pull-through sharpener can be convenient, while whetstones offer more control for cooks willing to learn the technique.
After sharpening, test the knife on paper or a ripe tomato. Do not test it on your thumb. Keep the blade protected in a knife block, magnetic strip, blade guard, or dedicated drawer insert. Loose blades in a drawer get dull, damaged, and dangerous fast.
Build a Carving Setup That Covers the Whole Cook
A carving knife handles the finish, but the best barbecue and roast dinners are won earlier. Trim raw meat with a boning knife. Break down tougher sections or tackle big prep with a cleaver. Use a chef knife for vegetables, herbs, and everything that rounds out the meal. Then carve with the blade designed for the moment.
That is why a capable knife lineup beats a pile of random gadgets. Dads That Cook builds its core knives around full-tang strength and real kitchen control, so the tools feel ready when dinner gets serious. Pair that kind of setup with an instant-read thermometer, and you can nail both parts of the job: cook the meat to the right temperature, then cut it with respect.
A carving knife will not rescue overcooked pork or under-rested brisket. But when the cook is right, it makes the payoff visible. Keep the blade sharp, give the meat time, find the grain, and make every slice count. The crew at your table will know you came prepared.