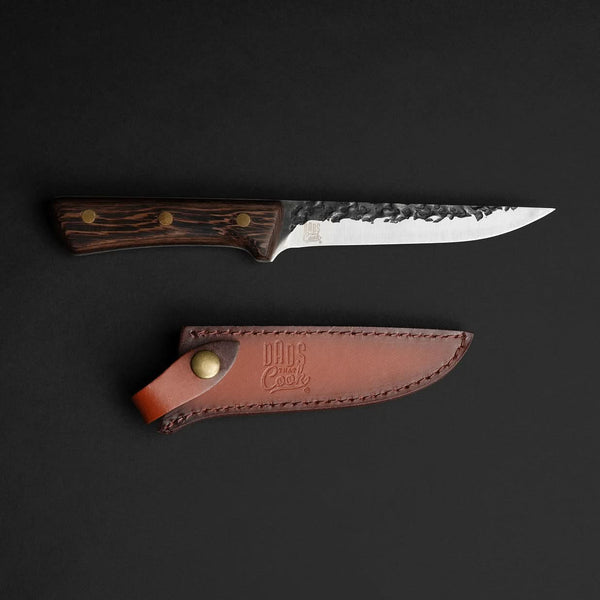
A boning knife earns its keep when the job gets close to the bone. It is not built to bulldoze through a pork shoulder or split a chicken in half. It is built to follow contours, separate meat cleanly, and give you control where a big chef knife feels clumsy. Learn how to use a boning knife well, and you will waste less meat, trim proteins faster, and serve cuts that look like you knew exactly what you were doing.
That is the kind of skill that changes a weeknight dinner and levels up a backyard cookout. A properly handled boning knife turns chicken thighs, ribs, steaks, roasts, and fish into work you can take pride in.
What Makes a Boning Knife Different
A boning knife has a narrow, pointed blade designed to work in tight spaces. Most are about 5 to 6 inches long, with a blade that is either flexible, semi-flexible, or stiff. The narrow profile reduces drag as you cut, while the point helps you find joints, seams, and the edge of a bone.
A flexible blade shines when you are filleting fish or removing silver skin from tenderloin. It bends gently along ribs and pin bones, helping you preserve more flesh. A stiffer blade gives you more leverage around beef, pork, and poultry joints. Neither is automatically better. The right choice depends on what hits your cutting board most often.
A quality full-tang knife also matters here. Boning work requires control more than brute force, so the handle should feel secure and balanced in your hand. The Dads That Cook 6-inch boning knife is built for exactly this kind of close, confident protein prep.
Set Up Before You Cut
Good knife work starts before the blade touches the meat. Put a damp paper towel or kitchen towel under your cutting board so it cannot slide. Use a board large enough to keep the protein stable and give your non-cutting hand somewhere safe to rest.
Keep the meat cold. Chilled chicken, steak, pork, and fish are firmer, less slippery, and easier to trim precisely. If a roast has been sitting out while you fire up the grill, give it a few minutes in the refrigerator before you start detailed knife work.
Your knife must be sharp. This sounds obvious, but a dull boning knife causes more problems than a sharp one. You compensate by pushing harder, the blade skips, and a clean controlled cut becomes a wrestling match. Sharpen before the blade feels dull, not after it starts tearing meat.
How to Use a Boning Knife Safely
Grip the handle firmly, but do not squeeze it like you are trying to crush it. For most cuts, place your thumb and index finger near the blade's base, with the remaining fingers wrapped around the handle. This gives you better feel and steadier direction than holding the very end of the handle.
Use your other hand to stabilize the meat with curled fingertips. Keep those fingertips behind the cutting path. Your knuckles can guide the side of the blade when making straight trimming cuts, but do not put a finger in front of the tip.
The key move is a series of short, deliberate strokes. Let the blade do the work. A boning knife is not a cleaver, so avoid chopping down through bone. If you hit hard bone, stop. Change your angle, find the joint, or switch to a heavier knife if the job actually requires cutting through bone.
Cut away from your body whenever possible, especially when removing skin or silver skin. If the blade slips, you want it moving into the board, not toward your hand. Slow is smooth. Smooth is fast once you know the path.
Find the Seams, Then Follow Them
The cleanest way to remove meat from bone is not to force a straight line. Look for the natural seams. Muscles are separated by thin layers of connective tissue and fat. Joints have small gaps where bones meet. Those are your lanes.
Start with the tip of the knife and make a shallow opening cut. Once you can see the bone or seam, angle the blade slightly toward it. Then use small strokes to scrape the meat away rather than slicing deep into it.
Keep the blade close to the bone. The bone is your guide. If you hold the knife too far away, you leave good meat behind. If you drive the blade too aggressively into the bone, you can nick it, dull the edge, and create ragged cuts. The goal is a light, controlled scrape that follows the shape in front of you.
Deboning Chicken Without Making a Mess
Chicken is one of the best places to build confidence because the joints are easy to locate and the meat responds well to a sharp narrow blade. For a bone-in thigh, place it skin-side down and find the thigh bone with your fingers. Make one lengthwise cut along the bone, exposing it from end to end.
Use the tip to free the meat from each side with shallow strokes. When you reach the knuckle at either end, scrape around it rather than hacking through it. Pull the bone upward as you work underneath it. That gentle tension makes the connective tissue easier to see and cut.
For chicken breasts, run the knife down one side of the breastbone, keeping the blade angled against the rib cage. Use long, smooth strokes to release the meat. The ribs curve, so let the blade follow that curve. This is where a slightly flexible knife can save a surprising amount of meat.
Want crispy skin-on thighs for the grill? Debone them without removing the skin, then open the meat flat. You get more even cooking, more surface area for seasoning, and a better shot at crisp skin.
Trim Beef and Pork With Purpose
A boning knife is the right tool for trimming fat caps, removing silver skin, and separating cuts along muscle seams. It is not always the right tool for portioning thick steaks. Use it for detail work, then reach for a chef knife when you need long, clean slices through boneless meat.
To remove silver skin from a tenderloin, slide the knife just under one end of the tough membrane. Grab that loose flap with a paper towel for traction. Angle the blade slightly upward toward the silver skin, not downward into the meat, and glide it forward while pulling the membrane back. Keep the blade nearly flat. The goal is to shave off the membrane, not carve away the tenderloin.
With ribs or a pork shoulder, use the knife tip to locate seams and expose the bones. Work in short strokes around cartilage and connective tissue. There is a trade-off here: ultra-aggressive trimming can make a cut look neat, but it can also remove fat that protects the meat and adds flavor. For the smoker, leave enough fat to do its job. For a leaner roast or cleaner presentation, trim more deliberately.
Fillet Fish With a Light Touch
Fish rewards patience. Start behind the gill plate and cut down until you feel the backbone. Turn the blade so it lies nearly flat against the bones, then work from head toward tail with long, gentle strokes. Do not saw wildly. Use the backbone as a rail and let the blade glide over it.
When removing skin, place the fillet skin-side down. Make a small cut between the flesh and skin at the tail end, then hold the skin firmly. Keep the blade angled slightly down toward the skin and pull the skin against the knife as you make short sawing strokes. With a flexible blade and a light hand, the skin should come away cleanly.
Pin bones are a separate job. Feel for them by running your fingers down the center of the fillet. Use clean fish tweezers if you have them. A knife can expose pin bones, but it is not the best tool for pulling them.
Clean and Store the Knife Like It Matters
Wash your boning knife by hand right after use, especially after raw poultry or fish. Use warm soapy water, wipe carefully from spine to edge, rinse, and dry it immediately. Do not leave it soaking in a sink where someone can grab the blade by accident.
Skip the dishwasher. Harsh detergent, heat, and loose contact with other utensils can damage the edge and handle over time. Store the knife in a block, sheath, magnetic strip, or protected drawer slot so the blade is not banging around with other tools.
The more often you use a boning knife, the faster you will recognize what it can do. Start with chicken thighs or a pork tenderloin, work slowly, and focus on following the bone instead of fighting it. Before long, that narrow blade will feel less like a specialty tool and more like the reason your best meals start cleaner.