Boneless chicken thighs are a weeknight weapon. They cook fast, stay juicy, take on big flavor, and lay flat for a hard sear on the grill or in a hot skillet. Learning how to debone chicken thighs puts you in control of the cut, the seasoning, and the final plate. You also get to keep the bones for stock instead of paying extra for someone else to remove them.
This is not a brute-force job. It is a precision job. The bone is your map. Follow it with a sharp knife, use your fingers when they can do the work better, and keep your cuts tight to the bone. After a few thighs, you will move through the whole pack with confidence.
What You Need Before You Start
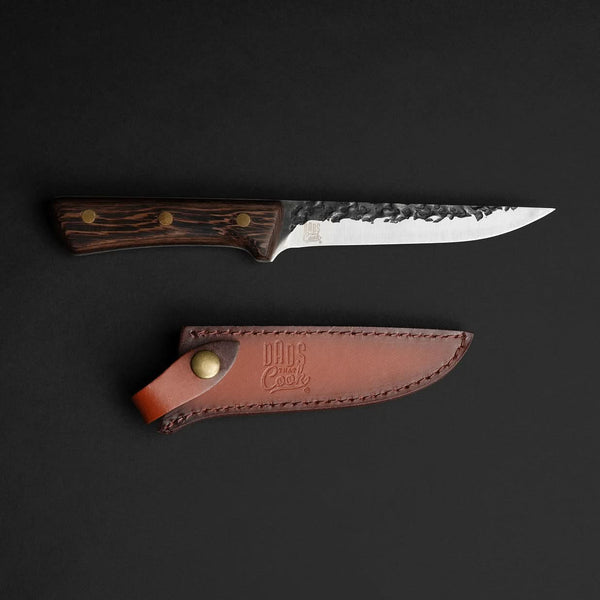
Set up a stable cutting board, a bowl for bones and trimmings, and a clean plate for the finished thighs. The star of the job is a sharp, narrow boning knife. A flexible blade makes it easier to ride the curves of the thigh bone without hacking away good meat. A Dads That Cook 6-inch boning knife is built for this kind of close, controlled protein work, but any sharp, well-balanced boning knife will get the job done.
Keep a paper towel nearby. Chicken thighs can get slick, and dry hands give you a better grip. If your cutting board slides, place a damp kitchen towel underneath it. A stable board is not a fancy detail. It is how you make clean cuts without chasing raw chicken across the counter.
Work with chilled thighs, not thighs that have sat out and softened. Cold chicken holds its shape, which makes the bone easier to feel and the meat easier to separate.
How to Debone Chicken Thighs Step by Step
Start with bone-in, skin-on or skinless thighs. Skin-on thighs give you another option: leave the skin attached for a crisp finish, or remove it and render it separately. Either way, deboning happens from the meat side, where the bone is easy to see and feel.
Put the thigh bone-side up
Lay one thigh on the board with the meat side facing up. You should see the length of the thigh bone running through the center. Run a finger along it first. Notice where it is thickest and where it tapers toward each end. That quick feel tells you where the knife needs to travel.
The goal is not to cut the thigh in half. You are opening the meat along the bone so you can free it without wasting the good stuff.
Make one clean cut along the bone
With the tip of your knife, make a shallow cut straight down the length of the bone. Start at the narrow end and follow the bone to the wider knuckle. Keep the blade shallow. You are exposing the bone, not carving deep into the thigh.
Once the bone is visible, use short strokes. Let the knife tip do the detailed work. Long, aggressive cuts are where people remove too much meat or slice through the skin on the other side.
Scrape the meat away, tight to the bone
Angle the blade slightly against one side of the bone and make small scraping cuts to release the meat. Your free hand should pull the meat gently away as you go. Then repeat on the other side.
This is the move that saves meat. Keep the blade almost touching the bone, like you are tracing its shape. If you see a little meat left behind, do not panic. Go back with the knife tip and shave it off. Those small scraps add up across a family-size pack.
Free the ends of the bone
The bone will still be attached at both ends by connective tissue. Pull the meat back to expose each joint area, then cut through the tough tissue holding the bone in place. You do not need to saw at it. A sharp blade and a deliberate cut will release it.
Lift the bone with your fingers as you make the final cuts beneath it. The bone should come away in one piece. If it fights you, stop pulling. Look for the last strip of tendon or meat still holding on, then cut that instead.
Trim only what needs trimming
Open the thigh flat and inspect it. Remove any hard cartilage, loose bone fragments, or large rubbery pieces of tendon. Leave some fat. Chicken thigh fat is flavor, and it helps protect the meat from drying out over high heat.
If one edge is especially thick, make a shallow horizontal cut to open it slightly. This is called butterflying, and it helps the thigh cook more evenly. Do not overdo it. A thigh does not need to be perfectly rectangular. It just needs to lie reasonably flat.
Skin On or Skin Off? Choose Your Finish
There is no single right answer. It depends on how you plan to cook the thighs.
For a screaming-hot skillet or grill, skin-on boneless thighs can deliver serious crispness. Score the skin lightly in a few places without cutting into the meat. This helps fat render and keeps the skin from curling into a tight ball. Start skin-side down over medium to medium-high heat, giving the fat time to render before you crank up the heat.
For marinades, skewers, tacos, stir-fries, or saucy grilled chicken, skinless thighs are usually the better play. They take on seasoning directly and are easier to slice after cooking. Remove the skin by gripping an edge with a paper towel and pulling it away from the meat. Use the knife only where it sticks.
Save the skin if you have the patience. Seasoned chicken skin can be rendered until crisp and used as a salty, crunchy topper for rice, salads, or mashed potatoes.
The Mistakes That Cost You Meat
The most common mistake is using a dull knife. A dull blade forces you to push harder, slip more often, and tear the chicken instead of separating it. Sharp steel gives you control. Hone your knife before the job and sharpen it when it no longer bites cleanly into the meat.
The second mistake is cutting too deep too soon. The bone tells you exactly where to work. Start shallow, expose it, and make small cuts along its sides. Big cuts may feel faster, but they create ragged thighs and leave less room for error.
Another mistake is trimming every visible bit of fat. You are not preparing laboratory samples. Thighs need some fat to stay rich and tender, especially over a grill. Remove thick, loose pockets if you want, but do not strip the meat bare.
Finally, do not toss those bones. Freeze them in a bag until you have enough for a pot of stock. Roast them first if you want a deeper flavor, then simmer with onion, carrot, celery, peppercorns, and water. One chicken dinner can pull double duty.
Cook Deboned Thighs With Confidence
Boneless thighs are forgiving, but they still deserve attention. Season them aggressively with salt before cooking. A simple blend of black pepper, garlic powder, smoked paprika, and a little brown sugar works beautifully for grilling. For a brighter direction, use lemon zest, oregano, garlic, and olive oil.
Cook over direct heat for a strong exterior, then move to a cooler zone if the outside is getting too dark before the center is ready. In a skillet, press the thigh flat for the first minute or two so it makes full contact with the pan. That is how you build the crust.
Chicken is safe when the thickest part reaches 165°F, checked with an instant-read thermometer. Thigh meat can handle a little more heat than chicken breast and often gets even more tender around 175°F to 185°F, especially when cooked slowly in a sauce. The best temperature depends on the result you want: 165°F for a juicy, quick-cooked thigh, or higher for that pull-apart tenderness.
Let the cooked thighs rest for five minutes before slicing. Then serve them whole, chop them for tacos, pile them onto a rice bowl, or slice them over a big backyard salad. Once you can debone your own chicken thighs, the grocery store pack becomes more than dinner. It becomes your next chance to sear, slice, and feed your people well.