That first crack through golden chicken skin gets everybody to the table fast. But a great roast chicken is not about fancy tricks. It is about control: dry skin, steady heat, accurate temperature, and a clean carve when the bird comes out looking like a victory lap. The right essential tools for roast chicken make that happen every time.
You do not need a kitchen packed with single-use gadgets. You need a compact lineup that handles prep, roasting, testing, resting, and carving with authority. Build around these tools, and Sunday dinner, a weeknight meal, or a backyard feast gets a whole lot stronger.
The 9 essential tools for roast chicken
1. A sharp chef knife
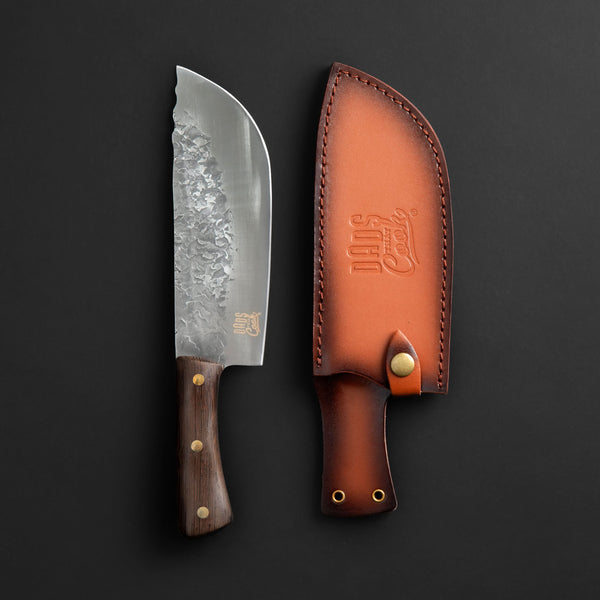
A sharp chef knife earns its keep before the oven even heats up. Use it to trim excess fat, remove a stubborn wishbone, halve lemons and onions for the cavity, chop herbs, and break down vegetables for the roasting pan.
Dull blades turn simple prep into a wrestling match. They crush herbs, tear chicken skin, and slip when you push too hard. A well-balanced, full-tang chef knife gives you control without making your hand work overtime. For most home cooks, a 7.5- to 8-inch blade is the sweet spot: large enough to handle serious prep, nimble enough for everyday cooking.
2. A boning knife for cleaner chicken prep
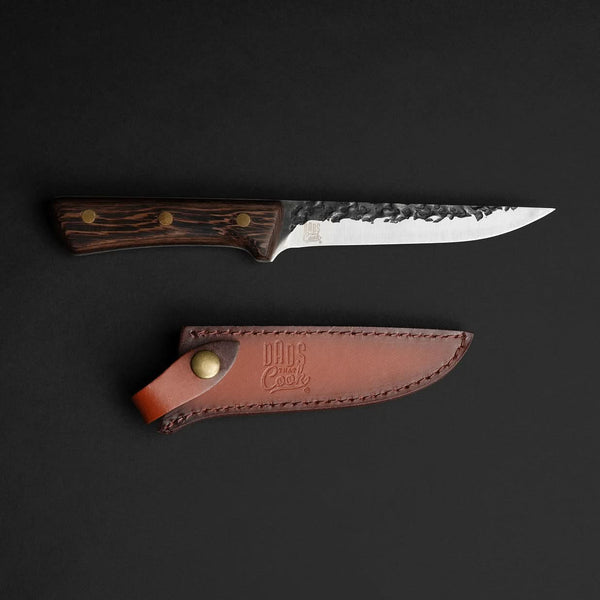
You can roast a chicken straight from the package, but a boning knife gives you options. Its narrow, flexible blade is built for working close to bone and joint. That matters if you want to remove the wishbone before roasting, trim loose pockets of fat, or spatchcock the bird for faster, more even cooking.
Spatchcocking is worth the effort when you want maximum skin exposure and a shorter cook time. Cut along both sides of the backbone, open the chicken flat, and press down on the breastbone. The trade-off is presentation: a whole upright bird has that classic table-centerpiece look, while a flattened chicken wins on crisp skin and speed.
A 6-inch boning knife is also your best friend at carving time if you prefer separating breasts, thighs, drumsticks, and wings into clean portions rather than slicing around the whole bird.
3. A solid cutting board
Chicken prep needs a stable landing zone. Choose a large cutting board that does not skate across the counter and gives you enough room to work without knocking aromatics onto the floor. Wood or a quality composite board both work well. What matters most is size, stability, and proper cleaning.
Use one side for raw chicken prep, then wash and sanitize it before carving the cooked bird. Better yet, keep a separate board for raw proteins if you cook a lot. That small habit keeps the job cleaner and lets you focus on the food instead of worrying about cross-contamination.
Place a damp paper towel or clean kitchen towel underneath the board to stop it from shifting. It is a simple move, but it creates a safer, more controlled workspace.
4. A roasting pan or heavy sheet pan
Your pan shapes the entire cook. A sturdy roasting pan with low sides gives heat room to circulate and catches the drippings for gravy. A heavy rimmed sheet pan does nearly the same job, especially for a smaller bird or a spatchcocked chicken.
Skip flimsy pans. They warp, burn drippings, and make it harder to move a hot bird without sloshing fat across the oven floor. Heavy-gauge metal holds its shape and browns vegetables more evenly.
For an upright whole chicken, set it on a bed of onions, carrots, celery, and halved lemons. The vegetables lift the bird slightly, add flavor to the drippings, and become a built-in side dish. If you want the absolute crispest underside, use a rack. Just know that the vegetables will not soak up as much chicken flavor beneath it.
5. A roasting rack, when crisp skin is the mission
A rack is not mandatory, but it is a strong tool when texture matters. Elevating the chicken allows hot air to move beneath it, helping the bottom skin brown instead of steam in its own juices.
The catch is cleanup. A rack creates more surfaces to scrub, and a lightweight wire rack can bend under a larger bird. Choose one that fits securely inside your pan and can handle high heat. If your bird is sitting on vegetables instead, that is a perfectly capable alternative. It depends on whether you want maximum crispness or soft, chicken-fat-roasted vegetables underneath.
6. An instant-read digital thermometer
This is the tool that separates hopeful cooking from confident cooking. Color, cook time, and clear-looking juices can all mislead you. A digital instant-read thermometer tells you what the chicken actually needs.
Insert the probe into the thickest part of the breast without touching bone. Then check the innermost area of the thigh. Pull the chicken when the breast reaches about 160°F and the thigh is around 170°F to 175°F. During the rest, carryover heat should bring the breast to the safe 165°F mark while keeping it juicy.
If your oven runs hot, your chicken is extra large, or you opened the oven repeatedly to baste, a thermometer saves dinner. It also prevents the most common roast-chicken mistake: leaving it in too long because you are afraid of undercooking it.
7. Long-handled tongs
Tongs are your command tool around a hot oven and a slick roasting pan. Use them to turn vegetables in the drippings, reposition the bird, steady it while testing temperature, or transfer pieces after carving.
Do not pierce the chicken with a fork while it cooks. Every unnecessary hole gives juices another way out. Tongs let you grip and move the bird without stabbing it. Look for a pair with a firm spring and enough length to keep your hands clear of hot fat.
8. A reliable timer
A timer sounds basic because it is basic. That does not make it optional. Roast chicken can go from beautifully browned to overdone while you are helping with homework, setting the table, or getting pulled into a conversation by the grill.
Set an initial timer for about 45 minutes for a typical 4- to 5-pound chicken roasting at 425°F, then begin checking temperature. The exact time changes with bird size, pan material, starting temperature, and oven accuracy. The timer gives you the prompt. The thermometer makes the final call.
9. A carving knife or sharp chef knife
You worked for that crisp skin and juicy meat. Do not destroy it with a dull knife at the finish line. A long carving knife makes smooth breast slices, but a sharp chef knife can do an excellent job if that is what you own.
Let the chicken rest for 10 to 15 minutes before carving. That pause gives the juices time to settle back into the meat instead of flooding the board. Remove the legs first by cutting through the skin between thigh and body, then pop the joint and slice through. Take the breasts off the bone in whole lobes before slicing across the grain. It looks better on the platter and keeps each serving tender.
The tool that supports every other tool: a sharpener
A knife sharpener may not touch the chicken, but it decides whether your knives perform when it counts. Keep your chef knife and boning knife sharp before a big cook, not halfway through one. A few deliberate passes can restore the bite needed for clean cuts through skin, joints, herbs, and vegetables.
There is no prize for muscling through prep with a tired blade. Sharp gear is safer because it responds predictably. It is also faster, which means more time at the table with the people who showed up hungry.
Set up your roast chicken station like a pro
Before you touch the bird, clear the counter and stage your tools. Keep the cutting board, chef knife, boning knife, paper towels, seasoning, and roasting pan together. Put the thermometer and tongs near the oven. Have a clean carving board and sharp carving knife ready for the finish.
That setup is not fussy. It keeps raw-chicken prep contained and gives you a clean path from fridge to oven to platter. Dads That Cook gear is built for exactly this kind of repeatable, hands-on work: dependable blades, accurate temperature checks, and tools that feel ready when the family is waiting.
Start with a dry bird, season it hard, trust the temperature instead of the clock, and let it rest before you carve. Then bring that crackling, golden chicken to the table like you meant to make it the main event.