A tri-tip can come off the grill with a killer crust, a perfect rosy center, and all the smokehouse swagger you worked for. Then one bad slicing move turns it chewy. Learning how to cut tri tip is what separates a good cook from the dad everyone asks to handle the steak.
This cut has a grain that changes direction. That is the whole game. Respect that shift, use a sharp blade, and every slice stays tender enough to make the crew reach back for more.
Why Tri-Tip Needs a Different Slicing Plan
Tri-tip is a triangular cut from the bottom sirloin. It is rich, beefy, and built for the grill, smoker, or hard sear. It is also a muscle with long, visible fibers that do not run in one straight direction from end to end.
Most of the roast has grain running one way, but the narrower point has grain that angles off in another direction. If you carve the entire roast in parallel slices, part of it will be cut correctly and part of it will be sliced with the grain. Those with-the-grain slices leave long muscle fibers intact, which means more chewing and less tenderness.
The fix is simple: cut the roast into two sections first, then rotate one section before slicing. It takes less than a minute and makes a serious difference on the plate.
What You Need Before You Slice
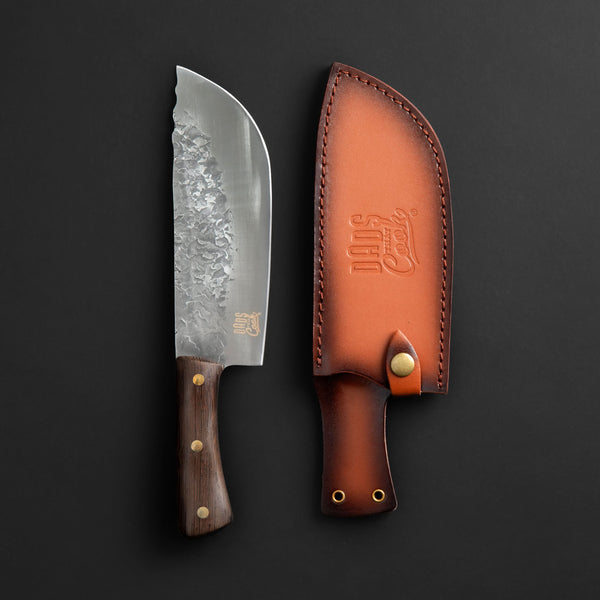
Give the meat a proper place to land. A stable cutting board with a juice groove keeps the work clean and prevents the roast from sliding around. Use a sharp chef knife or carving knife with enough blade length to make each cut in one smooth motion. A dull knife saws, tears the crust, and squeezes out juices.
A 7.5-inch chef knife handles most tri-tips well, especially if you keep the blade sharp. If you are serving a larger roast or want long, clean presentation slices, a longer slicing knife works too. The best tool is the sharp one you control confidently.
Do not slice the tri-tip straight off the heat. Rest it first. For an average 2- to 3-pound roast, give it 10 to 15 minutes loosely tented with foil. The juices settle back into the meat instead of flooding your board. That rest also makes the roast easier to handle and slice cleanly.
How to Cut Tri Tip Step by Step
Start by setting the rested tri-tip on the board with the broad end facing you. Look closely at the surface. You should see faint lines in the meat. Those are the muscle fibers, also called the grain.
On most tri-tips, the grain runs mostly lengthwise through the thick, wide portion. Near the narrow tip, it changes direction, often at a noticeable angle. Find the natural line where those two grain patterns meet. It usually sits around the middle of the roast, slightly closer to the pointed end.
Split the roast at the grain change
Make one crosswise cut through the tri-tip where the grain shifts. You are not trying to divide it into perfectly equal halves. You are separating two sections so each one can be sliced against its own grain.
Think of it as setting up the next move. Once the roast is split, the confusing part is over.
Rotate each section before slicing
Take the larger section and turn it so the muscle fibers run left to right in front of you. Your knife should travel across those lines, not alongside them. Slice perpendicular to the grain.
Then do the same with the smaller, pointed section. Rotate it until its grain also runs left to right. Slice across it. The two piles of slices may angle differently on the platter, and that is exactly right.
Make confident, even slices
Aim for slices about 1/4 to 1/2 inch thick. Thin slices are tender, easy to serve, and great for sandwiches, tacos, or a barbecue platter. Go closer to 1/2 inch when the tri-tip is cooked medium-rare and you want a steakhouse-style bite.
Use a long pull or push stroke rather than pressing straight down. Let the sharp edge do the work. Avoid sawing back and forth, especially through the crust. Clean cuts protect the juices and keep the slices looking as good as they taste.
Find the Grain Before You Cook
The easiest time to study tri-tip is when it is raw. Before seasoning, take 20 seconds to look at the muscle fibers and notice where they change direction. Some cooks make a tiny notch at the grain break before cooking so they can find it after the crust develops.
That small mark is a smart move when you are cooking after dark, working over a hot grill, or serving a hungry crowd. The exterior can get dark and textured after a hard sear, which makes the grain less obvious. A notch saves guesswork.
If you forgot, do not sweat it. Look at the cut face after slicing off one small end piece. The grain is much easier to see inside the meat. Adjust your angle before cutting the rest.
The Doneness Factor: Slice Only After You Nail the Temperature
Perfect carving cannot rescue an overcooked tri-tip. This cut stays at its best around medium-rare to medium, where the fat has softened and the center stays juicy. Pull it from the heat around 130 to 135 degrees F for medium-rare, or around 140 degrees F for medium, then let carryover cooking finish the job during the rest.
Thickness, grill heat, and cooking method all change the timing. Use an instant-read thermometer instead of trusting the clock. That is how you stop guessing and start serving meat with confidence.
For tri-tip cooked beyond medium, slicing against the grain matters even more. Higher doneness firms up the muscle fibers and gives you less margin for error. Keep the slices a little thinner if the roast went further than planned.
Common Tri-Tip Cutting Mistakes
The biggest mistake is slicing the entire roast in one direction. It feels natural because the roast looks like one piece, but its grain says otherwise. Split it first.
Another mistake is cutting with the grain because the fibers seem to guide the knife. That creates long strands of muscle in every bite. Your knife should cross those lines at roughly a 90-degree angle.
Cutting too early is another flavor killer. If juices pour onto the board when the first slice comes off, the roast needed more rest. Give it a few more minutes next time.
Finally, do not use a dull blade and force it through the meat. A full-tang, sharp knife gives you control when the bark is crisp and the center is tender. Dads That Cook gear is made for exactly that kind of hands-on work: steady grip, clean cuts, no wrestling match at the board.
Serve It Like You Mean It
Fan the slices across a warm platter and spoon a little of the board juice over the top. Tri-tip does not need much dressing up when it is cooked and sliced right. A pinch of flaky salt, chimichurri, salsa, or a tangy barbecue sauce can bring it home, but let the beef lead.
For leftovers, slice only what you plan to serve. Keep the remaining section whole in the refrigerator, then slice it cold or reheat it gently before cutting. Whole meat holds onto moisture better than a container full of pre-sliced pieces.
The next time tri-tip hits your grill, remember the move: find the grain, split at the change, rotate, and slice across. Sear. Slice. Repeat. Your family will taste the difference.